Wednesday, April 6, 2011

Beef Roast with Kickass Gravy

This is one of my favorites!  I make a DAMN fine gravy, if I do say so myself.  I will serve the roast with mashed potatoes (usually instant, unless we have company, then I'll make them from scratch) and a veggie of some kind.  Tonight, I also served The Bread, which comes to us courtesy of The Pioneer Woman, and you can find the recipe here:  http://thepioneerwoman.com/cooking/2010/09/the-bread/.  I highly recommend it.

For the roast, you will need:


  • A roast.  Duh!  I don't buy any particular cut of meat; I just get what's on sale.  Tonight was a tri-tip roast.  Isn't it pretty?
  • Worcestershire sauce 
  • 1 big spoonful of minced garlic (I buy this in bulk from Costco.  Don't judge.)
  • 1 packet Lipton Onion soup mix (again, you can use the generic, but why?)
  • Fresh ground black pepper
  • A Ziploc baggie big enough to hold your meat (that sounds dirty, doesn't it)
How to do this:

At least 3 hours before you plan on eating:
1)  In your baggie, mix the soup mix, garlic, and a fair amount Worcestershire sauce.  Muck it up really well.  Add a little bit of water - you want enough marinade to cover your meat.
2)  Remember my comment about cooking angry the other day?  This is a good time to do so.  I want you to take a fork and your piece of meat, and stab the hell out of it.  Both sides.
3)  Take your well-forked meat and put it in the baggie.  

4)  Seal the baggie.  I cannot stress this enough.  Please, please, please make sure that your baggie is sealed.  Holes in the baggie would also be a very bad thing.
5)  With your meat in the well-sealed baggie, massage the marinade into the meat. (Wow, this is turning into and R-rated recipe, isn't it?)  Lay the baggie on your counter or in your fridge.  I prefer baggies for marinades, since it's very easy to turn your meat and make sure everything gets covered.
6)  Every 30 mins or so, turn your baggie over.  And while you're there, give your meat a good rub down.  Really rub that marinade in to the roast; you want it to soak into all those lovely fork holes you made earlier.  So, yeah, I want you to grope that roast like a dirty old man would a cheerleader.  What? Too much?
7)  After at least 2 hours of marinating (or an hour-ish before you want to eat), preheat your oven to 425°.
8)  At the same time, heat a large skillet on your stove.  No oil, no spray.  Just heat it up.  You want it hot enough that water drops dance in it.
9)  Take your roast out of the baggie and save the marinade.
10)  Sear the roast in the hot skillet, just a minute or two on each side, then put the seared roast in your roasting pan, whatever kind you use.  The smaller the better, but big enough so that the meat does not touch the sides of the pan.
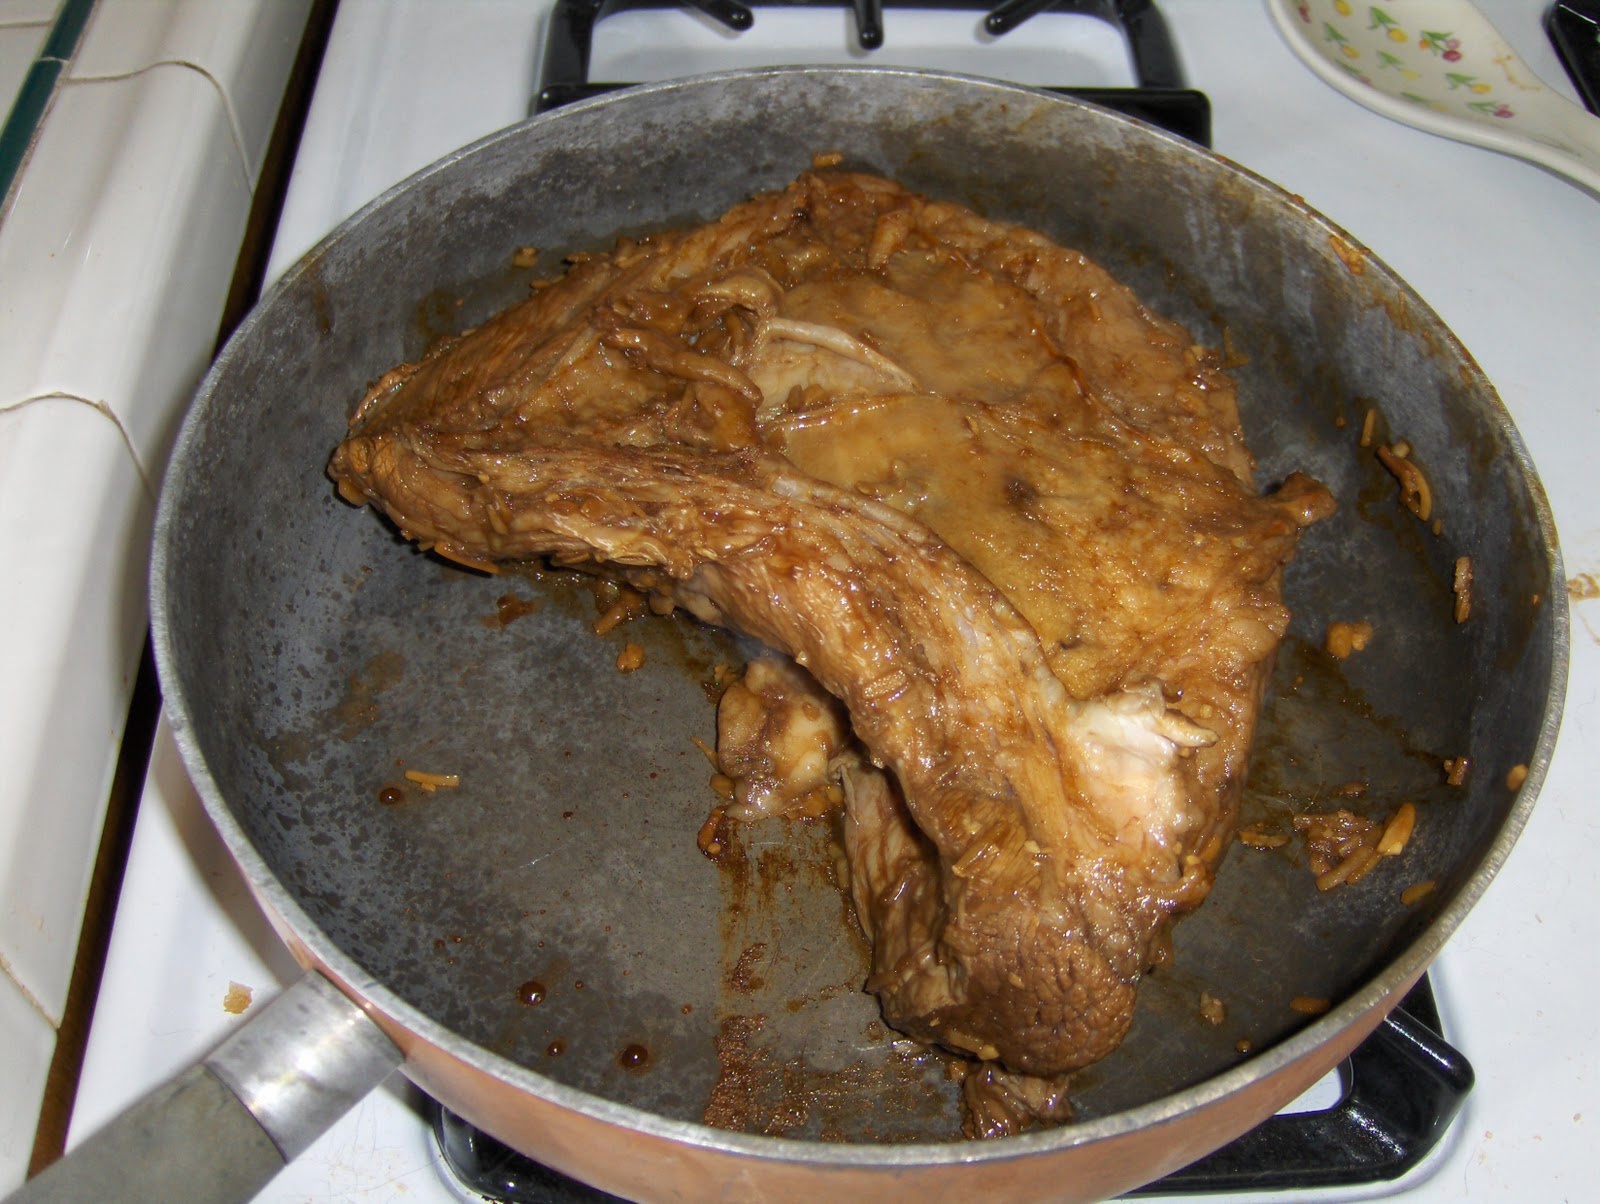

11)  Dump the marinade on top of the roast and grind some pepper on top.
12)  Add some water to the pan.  This is very important!  You are cooking the meat at a fairly high heat, and you do not want the juices to burn.  You will need those later.
13)  Roast the meat at 425° for 45 minutes.  Be sure to check on it periodically and make sure the juices aren't burning.  If you need to, add more water.  I didn't check on the roast as often as I should have today (Eleanor was grouchy), and my juices did burn a bit.
14)  After 45 mins, take the roast out, move to a platter, and loosely tent with aluminum foil for at least 15 mins.  The roast will continue to cook during this time.  After a few minutes, you might be able to drain off some additional juices from the plate.  Be sure to save all the juices for your gravy.  For my tri-tip roast tonight, this made for a very nicely done roast - medium-well on the edges, medium-rare in the middle.


The Gravy:

Gravy can be tricky.  That's why it's so easy to just buy a jar at the grocery.  But trust me, this is SO much better.  Because gravy requires a lot of attention, I wasn't able to take many pictures, so sorry.

You will need:

  • A half-stick of butter.  Real butter, not margarine.
  • Flour
  • The drippings and juices from your roast (see, I told you you'd need them).
  • A can of beef consomme
The How-to:
1)  Melt your butter in a small sauce pan.

2)  Turn heat down to low.  
3)  Slowly, slowly stir small amounts of flour into your melted butter.  You will need to keep stirring continuously from here on out.  I use a fork to help keep everything lump free, but you can use a whisk, also.
4)  Keep adding small amounts of flour until your roux (that's what the butter and flour mixture is called) is slightly thicker than yogurt.
5)  Just keep stirring, just keep stirring, stirring, stirring....
6)  Stir in the drippings.  Stir, stir, stir.
7)  Add about 2/3 to 3/4 of your can of consomme.  Stir, stir, stir.
8)  Continue to heat on low and keep stirring.  Gravy should start to thicken up, but you may also need to add a little more flour.  Just be sure to add the flour in tiny increments and stir continuously.
9)  Once your gravy has thickened, then you're ready to go!

Serve with potatoes and a veggie or a salad!  Oh, and don't forget The Bread!

Enjoy!

Monday, April 4, 2011

Cooking angry is OK. Trying new recipes when you're upset? Not so much.

So, I was having a rough day today and decided that I was going to make some apple bread, damn it.  Originally, I was going to make some Dutch Hot Apple bread, but that involved yeast and letting the dough rise and I just didn't have the energy to deal with that.

So, off I went to trusty google to find an apple bread recipe to try.  To be honest, I was looking for something like my zucchini bread, which is fabulous, but made with apples (which I had) instead of zucchini (which I did not have).

Now, you, as a logical person, might ask why didn't I just use the same recipe and substitute apple for zucchini?  Yeah, in hindsight I'm kind of wondering that, too.

After some searching on-line, I stumbled across this:
http://www.cdkitchen.com/recipes/recs/410/Apple_Bread_II51709.shtml

It looked decent, so I thought I'd give it a try....while making my own adjustments, of course.  The recipe makes 2 loaves, but I only have 1 loaf pan (yes, I know, I need to remedy that).  So, I made one loaf and then made the other loaf.  And, as for adjustments, I used more apple than called for (more on that in a minute) and I added raisins.  That's all I changed.

Problems I encountered:
1.  I used too much apple.  Way too much apple.  I never quite realized how much chopped apples 4 apples can make.  Trust me.  It's a lot.
2.  There was a lot of oil in the recipe.  1 1/4 cups.  I don't understand that.
3.  There was also a lot of sugar, and it never quite all dissolved for some reason.  The end result was gritty bread.
4.  The recipe gives the oven temperature at 300° and a baking time of 1 hour.  Yeah, this didn't work (or else I messed up worse on the batter than I thought).   The first loaf was still gooey after an hour.  I needed the oven at a higher temperature for dinner, so I boosted it up to 350°, and the bread seemed done after another 15 minutes.  I let it cool and tried to bust it out of the loaf pan so I could get the 2nd loaf in the oven.  It fell apart coming out of the pan, with the bottom 1/3 or so stuck in the pan.  The second loaf cooked better at 350° for an hour.

So, yeah, the recipe (and the cook) had some issues.  It was a civil break-up, though.  We parted as friends.

Sunday, April 3, 2011

Things you should always have in your pantry or fridge...

In my very humble *cough cough* opinion, there are certain ingredients you should always have in your pantry or fridge.  You never know when you might need them.  And I'm not talking about the standards like salt or pepper or whatnot.

Case in point:  Not too long ago, I decided on a whim that I wanted to make glazed pork chops in a creamy marsala sauce.  (I will make it again soon and post the recipe, I promise.)  I had the chops out and thawed, the veggies prepped, and was ready to go when I realized I was missing an ingredient.  Not a big deal for the average person, you just hop in the car and go to the store, right?  Well, this happened to be a day when Adam had the car, so I was stuck.  Fortunately, my friend Gigi was bringing her son over for a play date, so I was able to have her stop and get what I needed.

But this just reinforced that you should have certain things on hand at all times..... just in case.

Like these:

  • At least one can of cream of mushroom soup
  • Lipton's Onion Soup Mix (you can use the generic if you want, I prefer the real thing)
  • Butter (real butter, not margarine)
  • Egg noodles
  • Rice
  • Frozen chicken breasts

OK, so that's what comes to mind right now.  I will revise the list as I think of things.

Coming up later this week will be postings for my beef roast with homemade gravy, and a new black bean soup recipe.  I'm also hoping to try a Hot Dutch Apple bread at some point this week.

Until then, everyone be safe!

Saturday, April 2, 2011

Poor Man's Chicken Dijon

This is a very versatile and easy dish.  Just by varying the amount of mustard, you can greatly change the personality of the dish from very delicate to make-your-mouth-pucker tangy.  This can be served over egg noodles or rice; tonight, I used rice.  You can also add fresh mushrooms to this dish (I forgot them at the store, so we did without tonight).

You will need:

  • 1 onion, chopped.
  • 2 skinless, boneless chicken breasts.  You can use them whole, but I prefer to slice them into strips or nuggets.  They cook quicker that way.
  • 1 or 2 cans Cream of Mushroom soup.  Use 2 cans of soup for a saucier dish.  Use only 1 can if you want a more chicken and onion focused dish.  I generally use 2 cans, but tonight I only used one.
  • Dijon mustard, to taste.  Tonight I am using Coarse Ground Dijon mustard, but you can use whatever you variety you want.
  • Butter, 4 tbsp (More on my butter vs margarine thoughts later)
  • Milk

What to do:
  • Chop your onion, as fine as you prefer

  • Sautee onion in butter until translucent.  (If you are adding in fresh mushroom, do it now.)

  • While onion is cooking, chop up your chicken if you are wanting strips or chunks. (If you need to see a picture of chopped up chicken, let me know and I can add it.  Otherwise, I'm going to assume you know what raw chicken chunks look like.)
  • Add chicken to pan with onions and cook through.
  • Once chicken is cooked, add your can (or cans) of soup, a splash or two of milk (per can of soup), and your mustard. I generally use at least 4 tbsp of mustard (I think, anyway.  I don't measure, I just dump it in.)  Again, the amount of mustard you add will change the flavor of the dish significantly.  Be careful not to add too much milk, as you don't want your sauce to be runny.  It will seem thick at this point, but it will thin out as it cooks.  So, seriously, just a splash or two of milk per can of soup.
  • Mix all ingredients together.  Add fresh ground pepper to taste. (Please keep in mind that the color of the dish will vary depending on how much and what kind of Dijon mustard you are using).

  • Cover and simmer on medium-low for 10 mins or so, stirring periodically.
  • Serve over rice or noodles.


Hope you all enjoy this as much as Eleanor did!


Monday, March 28, 2011

Pineapple Bread Pudding

A great way to use stale French bread, especially if you baked too many loaves when learning how to make French bread like I did.  A true comfort food.  Would be great served with vanilla ice cream or custard.

You will need:

2 cups milk, scalded (I used 2%, but whole or half-n-half would make the pudding richer)
3 tbsp butter, melted
4 cups French bread, torn into bite sized pieces. Slighty stale is best.
3 eggs
1/3 cup granulated sugar
1/3 cup brown sugar
1/2 tsp vanilla
1/4 tsp cinnamon
20 oz can crushed pineapple, drained


1)  Heat oven to 350°
2)  Use a bit of your melted butter to grease sides and bottom of casserole dish
3)  In saucepan, scald the milk.  Mix in melted butter.
4)  Place bread in casserole dish.  Like this (as if you couldn't figure it out):


5.  Pour milk and butter mixture over bread. Stir. Let sit for at least 5 mins.  It will look all gooey, like this:


6)  In a separate bowl, beat the eggs, then add sugars, vanilla, and cinnamon.  Add drained pineapple.


7)  Pour egg/pineapple mixture over bread. Mix well.


8)  Bake uncovered at 350° for 60 minutes or so, until top is golden brown and springs back when touched.  May be served warm or cold, but pudding will settle as it cools.

.

Welcome!

For some reason, I often feel the need to announce to the world via FB what I am cooking for dinner, want to cook, or want to learn how to cook.  This inevitably results in people asking for recipes.  Instead of trying to keep up with everyone and remember who I sent what, I decided to start this blog.  This way I can detail my recipes, include pictures, and (hopefully) get feed back from folks so I can see what needs to be tweaked.

I do not claim to be a professional anything, much less a chef.  I rarely measure anything while cooking, although for the sake of the recipes, I will try to at least give a vague idea of the amounts of the ingredients I am using.  I also do not claim to be ethnically true to the recipes; for example, my Greek potatoes might be completely unGreek or my Hungarian paprikash might give a bad name to all things Hungarian.  I don't know.  I start with a basic idea, or someone else's recipe, and I change things as I feel they are needed.  I will try and give credit if I am using someone else's recipe, but I almost always changes things to make them more "my own".

Enjoy!